How to use the Canvas
Watch basic and advanced video tutorials on YouTube.
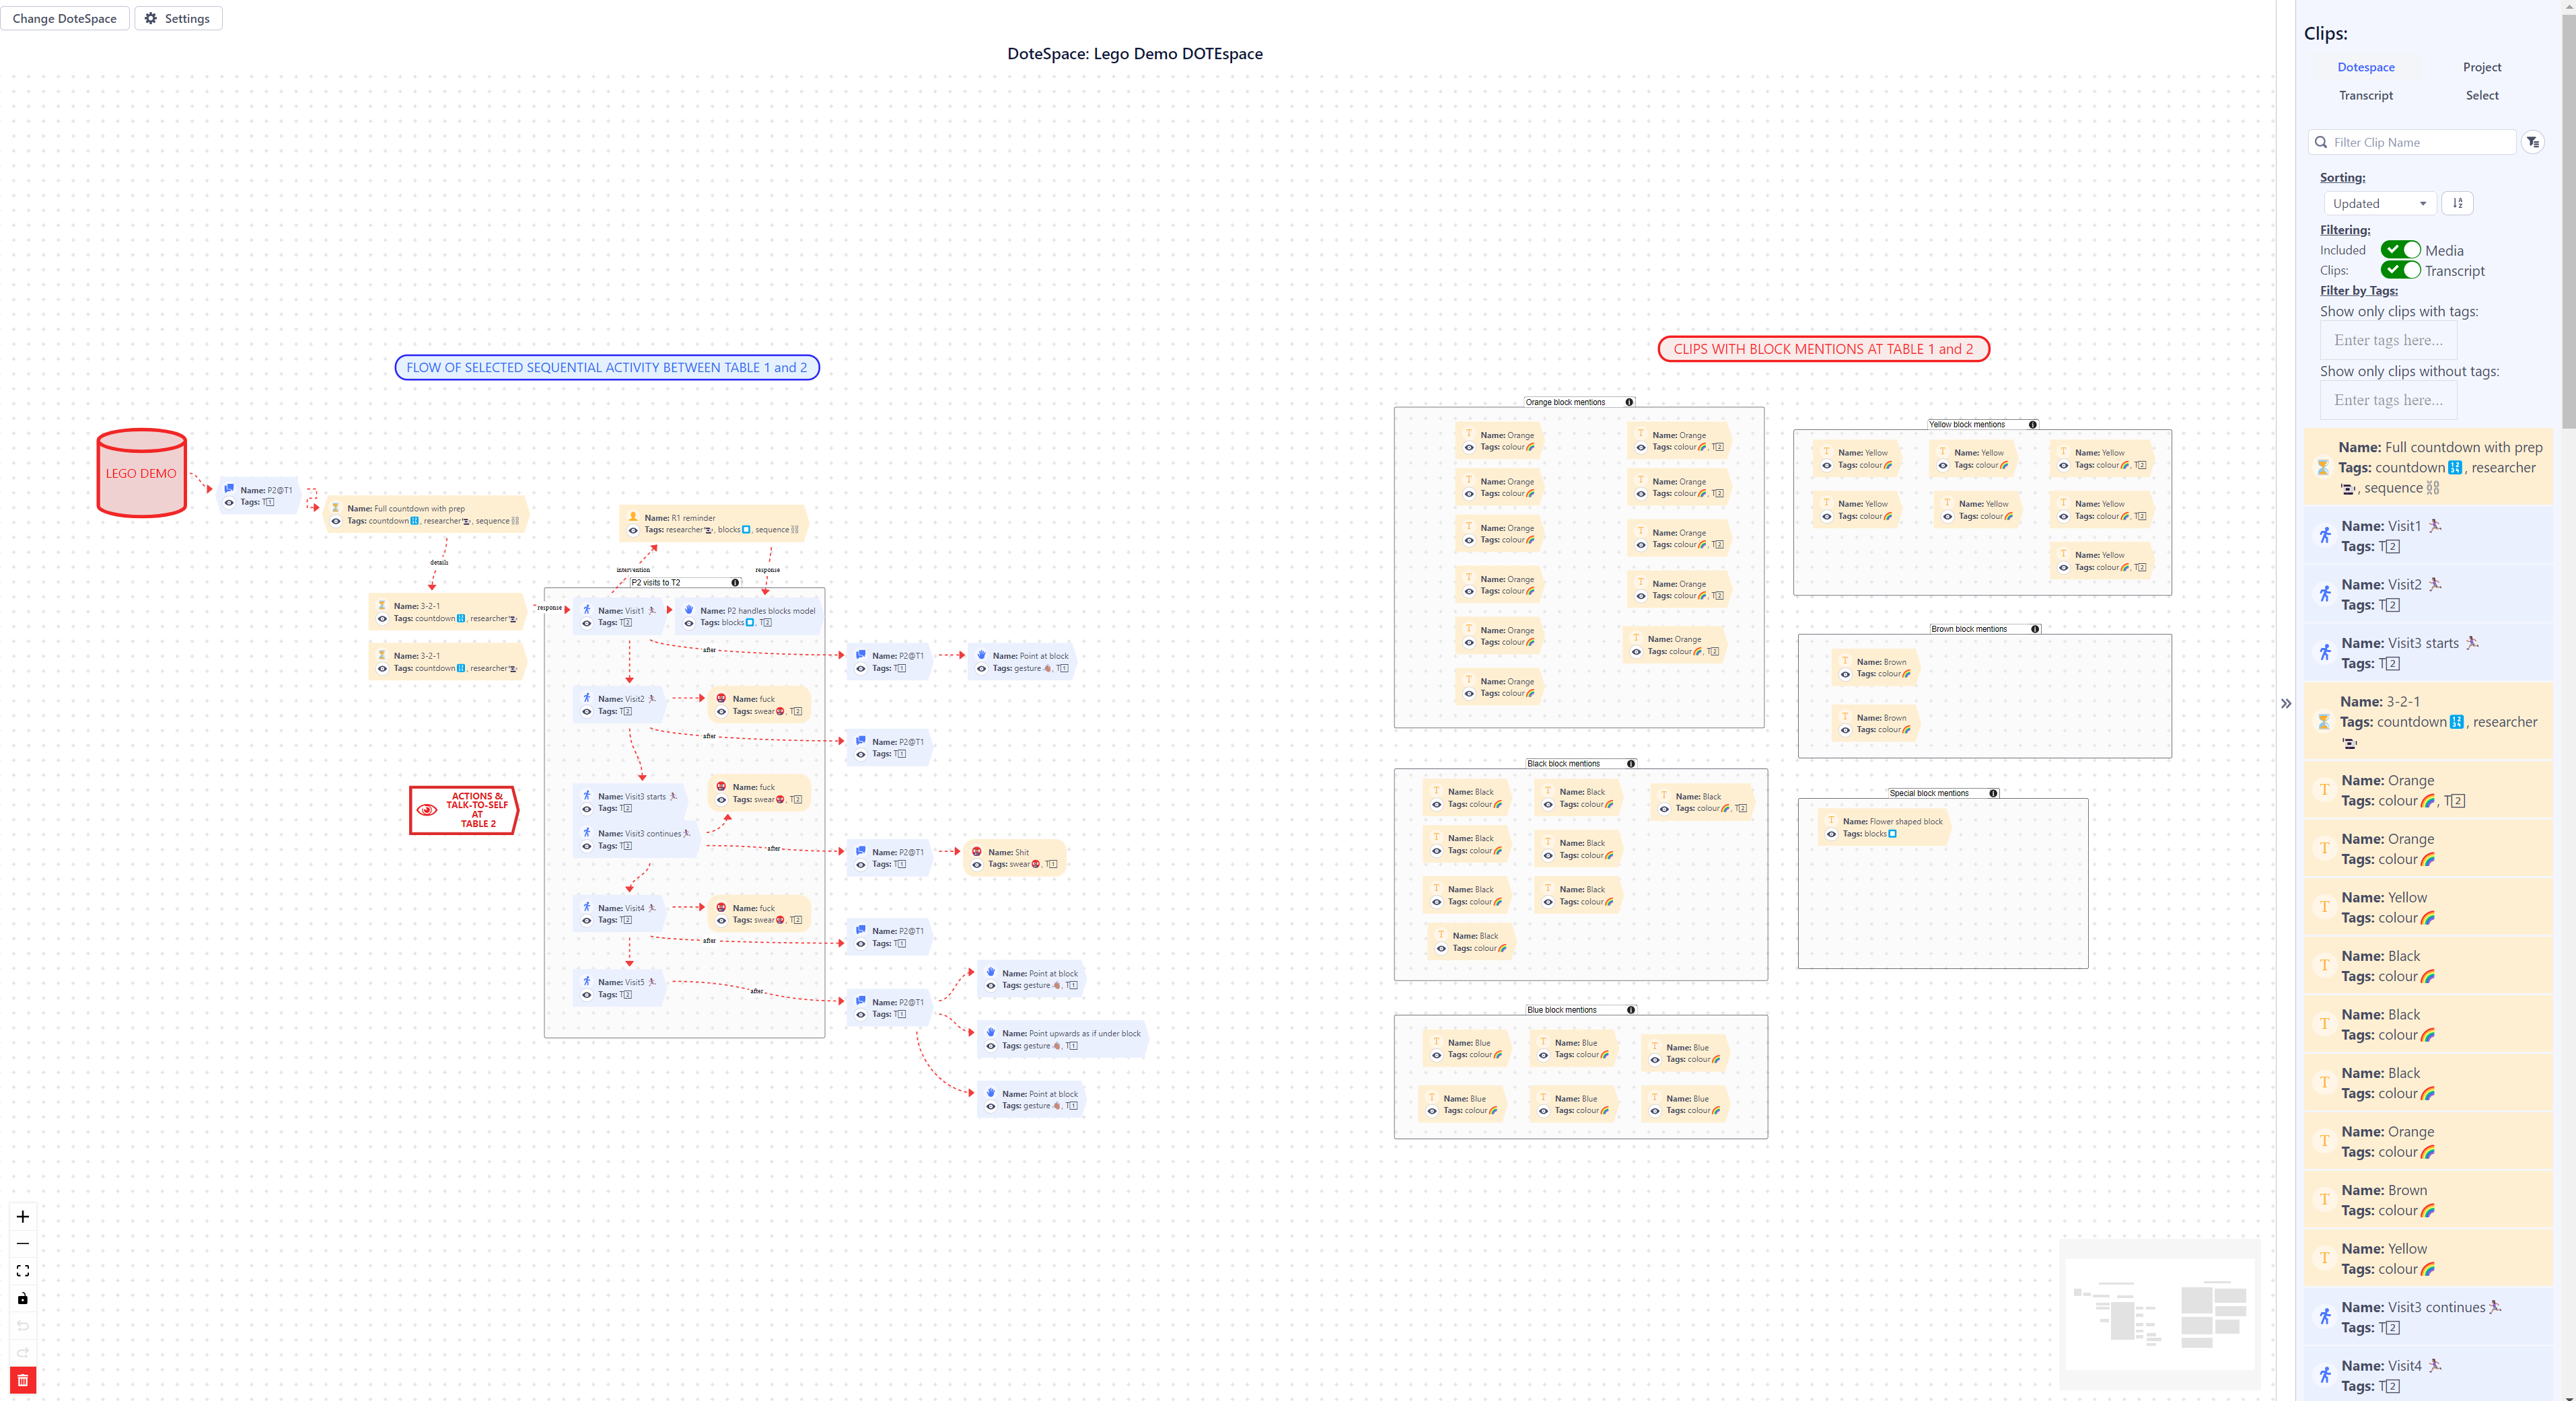
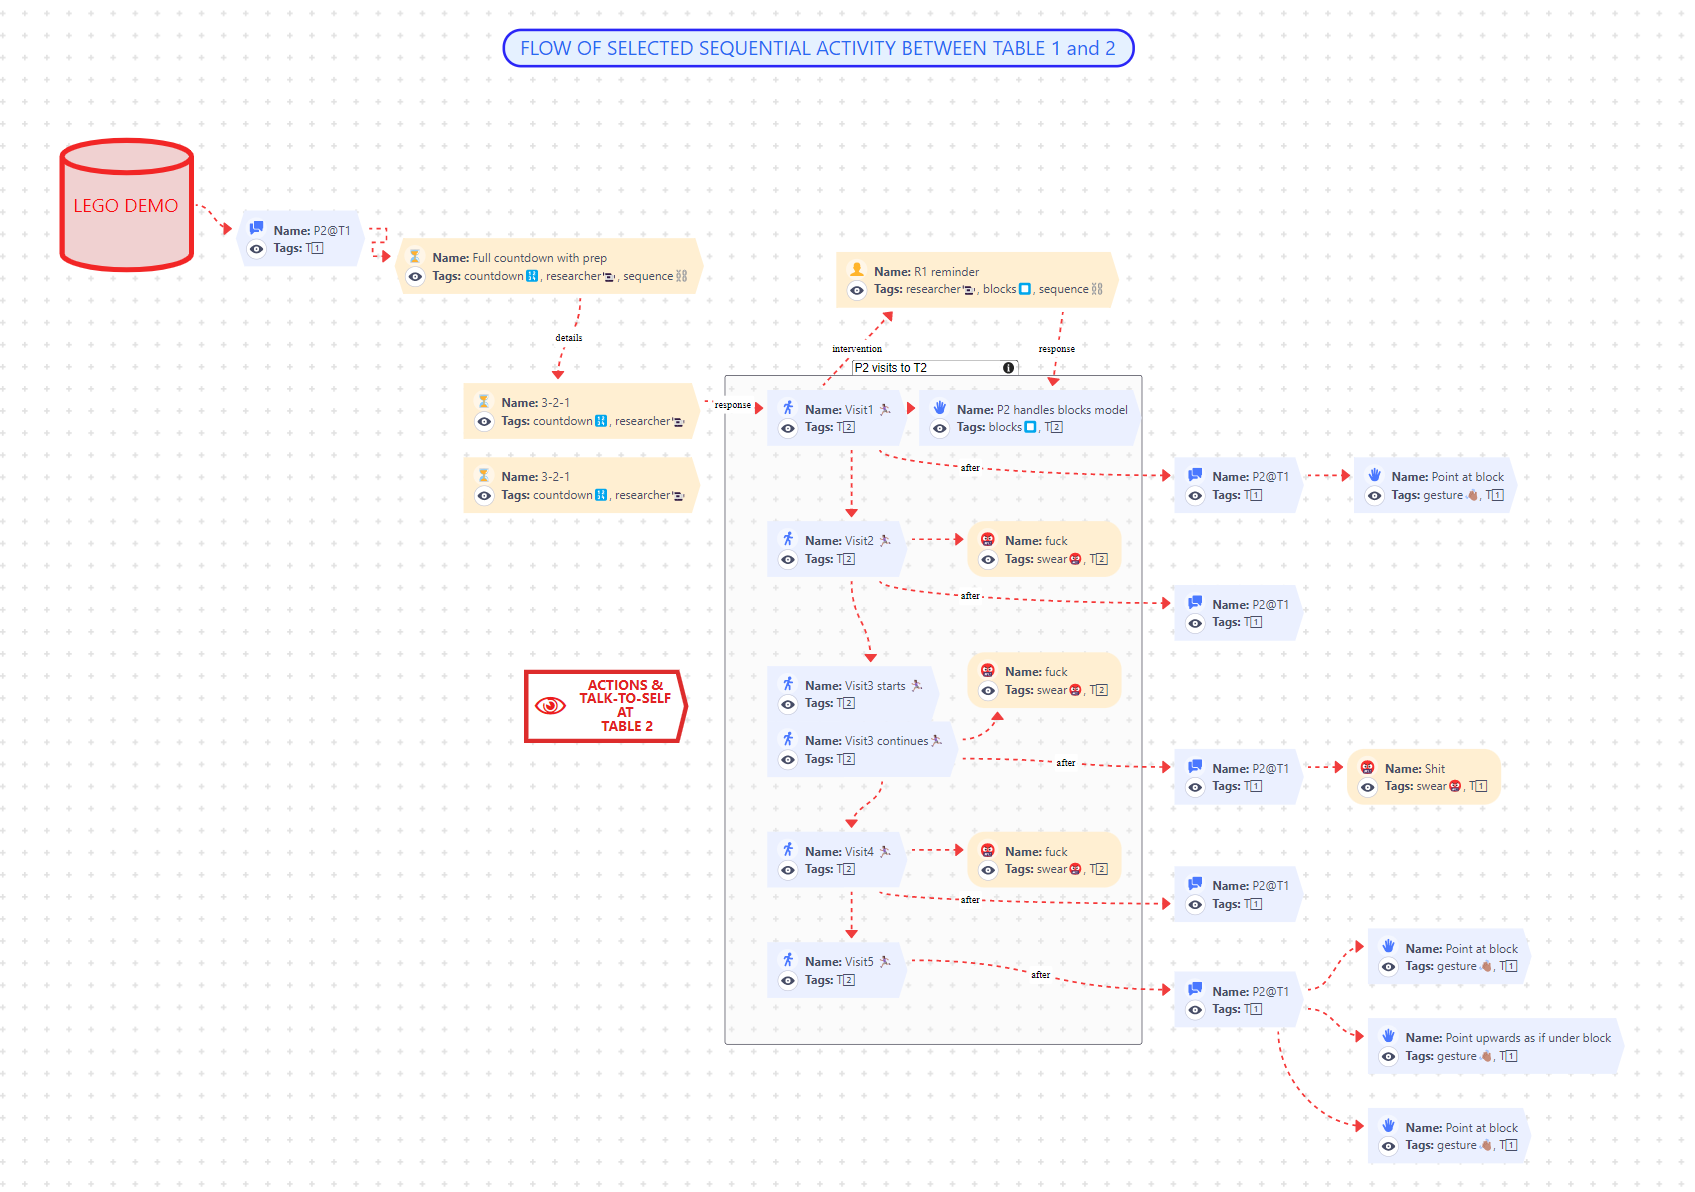
A 2D visual canvas is available for arranging and grouping your clips and their relationships. This is good for mind-mapping as a perspective or an analysis is developing while you are making clips from your DOTEspace.
At present, only one Canvas can be opened for each DOTEspace. Each Canvas is stored and will be reopened when selected the next time you restart DOTEbase. A Canvas can be exported and imported with its DOTEspace.
The Canvas space is infinite in all directions. One can add clusters of Clips in multiple locations on the Canvas, though with 100s of clips it may become cluttered.
Note that unlike for the main DOTEbase tools, actions on the Canvas (moving clips, connecting lines etc) can be undone and redone (see the buttons on the bottom left of the Canvas panel).
Open and select a Canvas
- Click on the
Open Canvasbutton. - Click on the
Change DOTEspacebutton. - Select a DOTEspace and its canvas.
- A fresh canvas will open or the prior populated canvas will reopen.
- A clips panel opens on the right
When selecting a clip etc on the Canvas a node settings panel opens. To revert to the clips panel, just click somewhere else in blank space until the panel reopens.
Resizing and moving the canvas
One can resize the canvas, re-center the Canvas and lock the canvas using the buttons in the bottom left of the Canvas panel. Use the +/- buttons to zoom in and out. Use the square button to fit everything in and re-centre
One can also clean the Canvas completely to start from square one again. The old Canvas cannot be recovered.
Adding a Clip to the canvas
On the right is a list of all clips in the current DOTEspace. Clips can be filtered in two ways, by level and by search string. For example, one can restrict the list of clips displayed to a specific Project or Transcript.
A clip can be dragged and dropped onto the Canvas (no limit to how many times a clip can be added to each Canvas). Once on the Canvas, properties such as icon or custom emoji can be changed by clicking on the clip to open up the clip node settings.
By selecting multiple Clips on the Canvas while pressing the CTRL or OPTION key, multiple Clips can be selected and edited as a group of nodes (and moved together).
Also, a group of clips can be selected by pressing the SHIFT key and dragging a rectangular lasso around the clips.
Hovering over a clip will reveal meta-data about the clip.
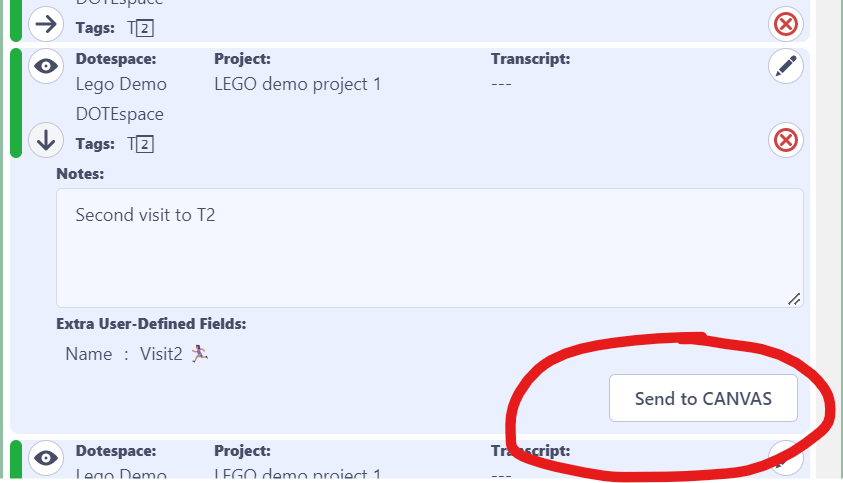
Clips can be also added directly from the main DOTEbase window in the Clips Viewer, the Collection Viewer and Search.
- Select a clip in one of those two panels, and click the right arrow button to expand the clip details.
- At the bottom is a
Send to CANVASbutton that will add that Clip to the Canvas. - If a Canvas is not currently open, it will be sent to the Canvas next time it is opened in the current session.
Alternatively, for Media Clips one can right click on a clip in the Media Clips Organiser and select Send Clip to Canvas or Send Tier to Canvas with all clips on that Tier sent.
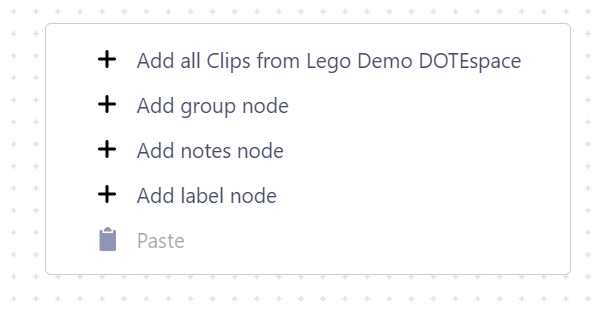
By right clicking on the Canvas in blank space one can add ALL Clips in the current DOTEspace to the Canvas in one go. The Clips will be arranged in a random pattern on the Canvas. This is not recommended when there are more than 20 Clips.
Moving clips
Clip nodes can be selected individually and dragged to a new location.
Or they can be selected as a group by clicking and dragging a virtual rectangle to encompass a number of clips.
Or they can be selected accumulatively by clicking on each node while pressing the CTRL key.
Adding a link between clips and other nodes
Links can be added that connect clips and other nodes. To add a connection link, click on the Clip and click on one of the link receptors, drag to another node receptor.
The colour, type and shape of the line, as well as arrowheads and caption, can be changed in the line settings.
Adding a Group
By right clicking on the Canvas in blank space one can insert a grouping box. Any clips placed within that box will be grouped together and can be moved together by dragging the box.
Adding a Text node
A Text node can be added by right clicking the Canvas and selecting Add notes node.
An emoji icon can be added as well the font size/colour and shape of the node etc.
A Text node can be linked to other nodes by selecting it and clicking one of the link receptors that are visible. Drag the line to another node receptor.
Adding a Label node
A Label node can by added by right clicking the Canvas and selecting Add label node.
The font size/colour can be changed as well as the shape of the node etc.
A Lavel node can be linked to other nodes by selecting it and clicking one of the link receptors that are visible. Drag the line to another node receptor.
Changing defaults in Settings
A number of default settings can be changed in Settings that apply to all Canvases.
Click the Settings button.
- General
- Background - what type of background to the Canvas
- Minimap - options for the minimap that shows the complete Canvas
- Controls - options for the control group box in the bottom right
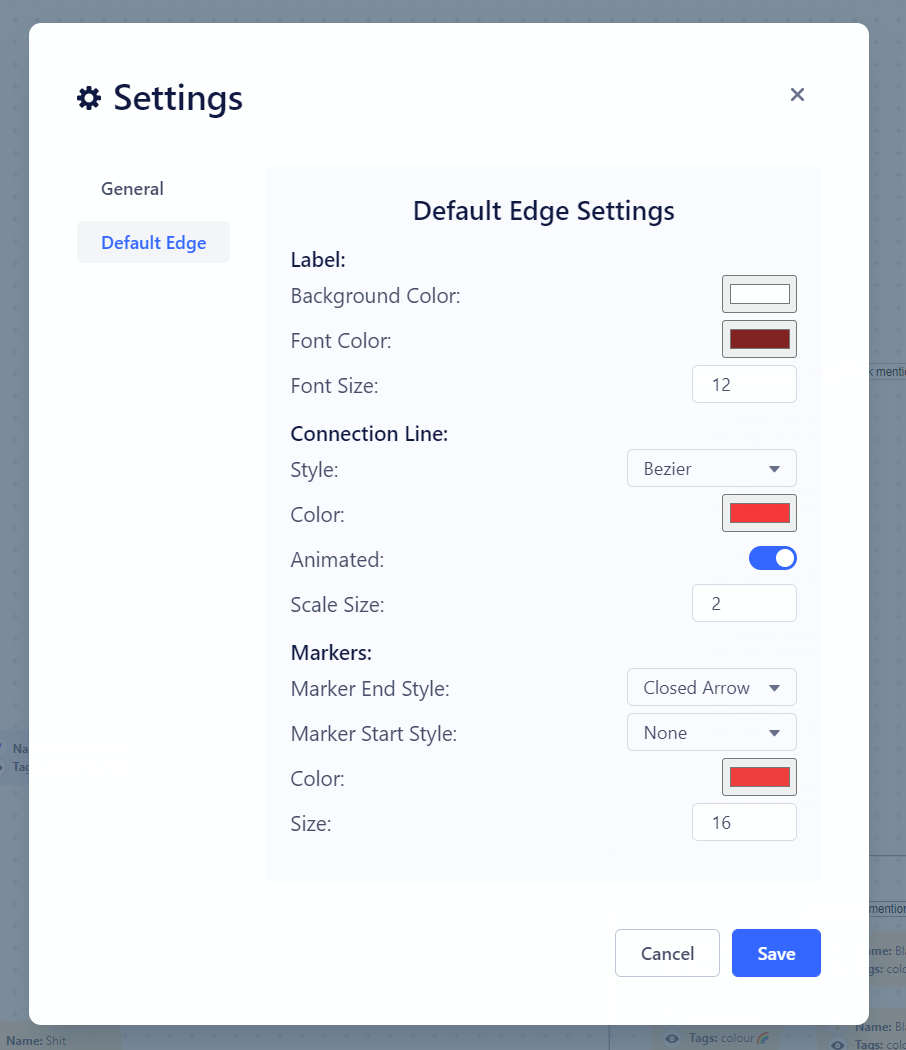
- Default Edge
- Label - options for labels on lines
- Connection line - options for the style of the connecting line
- Markers - options for the endings of connecting lines