How to use Clip Presets
Watch video tutorial on YouTube.
Because one often repeatedly creates Clips with a similar style and/or meta-data in a DOTEspace, then we offer Clip Presets that you can set up and apply when making a new Clip or editing an existing Clip. This should speed up your workflow and allow you to focus on qualitative analysis.
Clip Presets can be created for Transcript Clips and Media Clips, though they can be applied universally to both Clip types in a DOTEspace.
What do Clip Presets save?
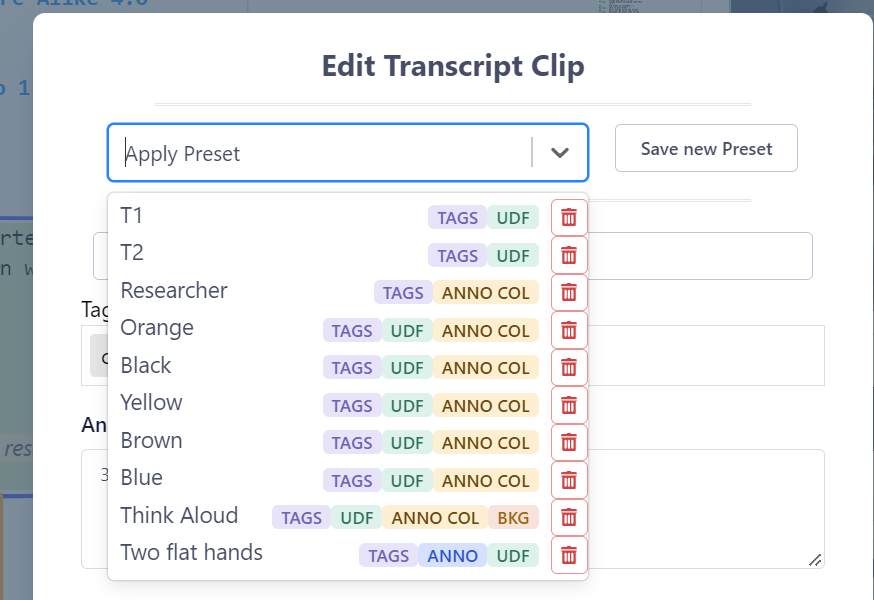
Saved Clip Presets indicate which of five style and meta-data elements have been saved:
- Tags (TAGS) - all tags are saved when a Preset is created
- Annnotation (ANNO) - the annotation text field is saved when a Preset is created
- Annotation Colour (ANNO COL) - the status and value of the annotation visual style + colour is saved when a Preset is created
- Background (BKG) - the status and value of the Background colour is saved when a Preset is created
- User-defined Field (UDF) - all user-defined fields are saved when a Preset is created
The fundamental principle of Clip Presets is that they are applied on top (overlay) of the current Clip's style and meta-data. Thus, if a Clip Preset has a specific value(s) saved, then when it is applied, it will overwrite the value(s) in the current Clip. However, if a Clip Preset does not have a specific value(s) saved for an element, then the current value of that element in the Clip will not be replaced. For example, if a Clip Preset has a specific Visual Style + Annotation Colour + status saved, but not a Background Colour + status, then the Visual Style and Annotation Colour (and status) will be overwritten, but the Background Colour + status will not.
Creating A Clip Preset
At the top of either the Media Clip or Transcript Clip dialog box is a section for Clip Presets.
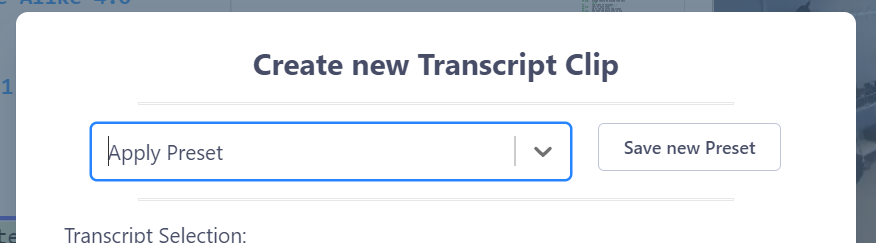
- To create a Clip Preset, one must have a Clip open. This could be a Transcript Clip or a Media Clip. Also, it could be a new one or an existing one.
- If the meta-data and style settings are to your liking, then click
Save new Presetbutton. - Enter a unique name for the Preset.
- Select which elements are to be saved in the Preset. The default is all.
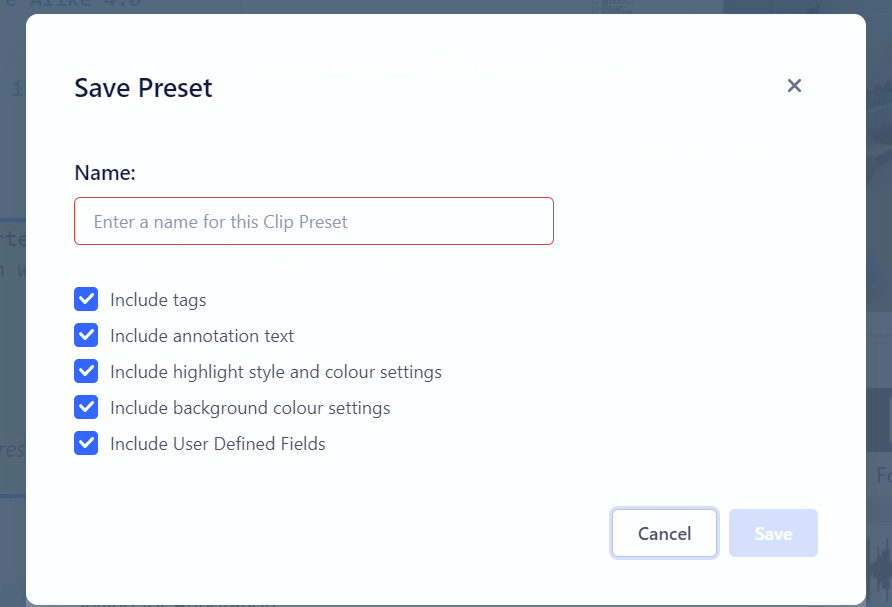
The new Preset will appear at the bottom of the list of available Presets. The list order cannot be changed.
Applying a Clip Preset
If you have saved one or more Clip Presets, then they are available to apply every time one creates or edits a Clip.
- Select the Apply Preset drop-down menu.
- In the list, you will see a list of Presets ordered by creation date.
- The type of meta-data that has been saved and that will be applied is shown.
- Select the Clip Preset to apply.
- Changes will be made to only those elements in the Clip that were saved in the Preset.
Deleting a Clip Preset
- To delete a Preset, open an existing Clip or create a dummy Clip.
- Select the Apply Preset drop-down menu.
- In the list, you will see a list of Presets ordered by reverse creation date.
- Click the Delete icon to remove the Preset(s).
Note that deleted Presets are not recoverable and that deleting them does not affect any existing Clips.
Editing a Clip Preset
It is not possible to directly edit an already saved Clip Preset. There are indirect ways to achieve this goal:
- One can simply delete the Preset and create a new one with the same name but with the new/edited elements.
- One can also create a dummy Clip, apply the Preset to be edited, tweak the meta-data and then save as new Preset. The original Preset can be deleted.
This is clumsy, but at present there is no Clip Preset Manager implemented.
Strategies for using Clips Presets efficiently
Here are some tips:
- To create a new Preset without creating a Clip, one could create a dummy Clip and tweak the meta-data, then save as new Preset. The dummy clip can be cancelled.
- A basic strategy is to create a set of Clip Presets that one uses often to quickly assign the correct meta-data and style to a new Clip.
- One could also create a set of Clip Presets that can be applied one after another to fill out specific elements of the style and meta-data in sequence. This is useful when there are different collections of elements that could be applicable, eg. one could apply the desired Preset for Tags only, followed by the desired Preset for Annotation style and colour only. This gives more flexibility with fewer Presets.
- Note that Annotation style and Background elements in a Preset save the status of the colour, ie. is it toggled on or off.
- Unlike Colour Swatch Presets, Clip Presets are applied once only and forgotten; they are NOT styles that can be associated with Clips in which all changes to the Style apply to all Clips with that style.
- Clip Presets are not available when making Transcript Clips in DOTE.