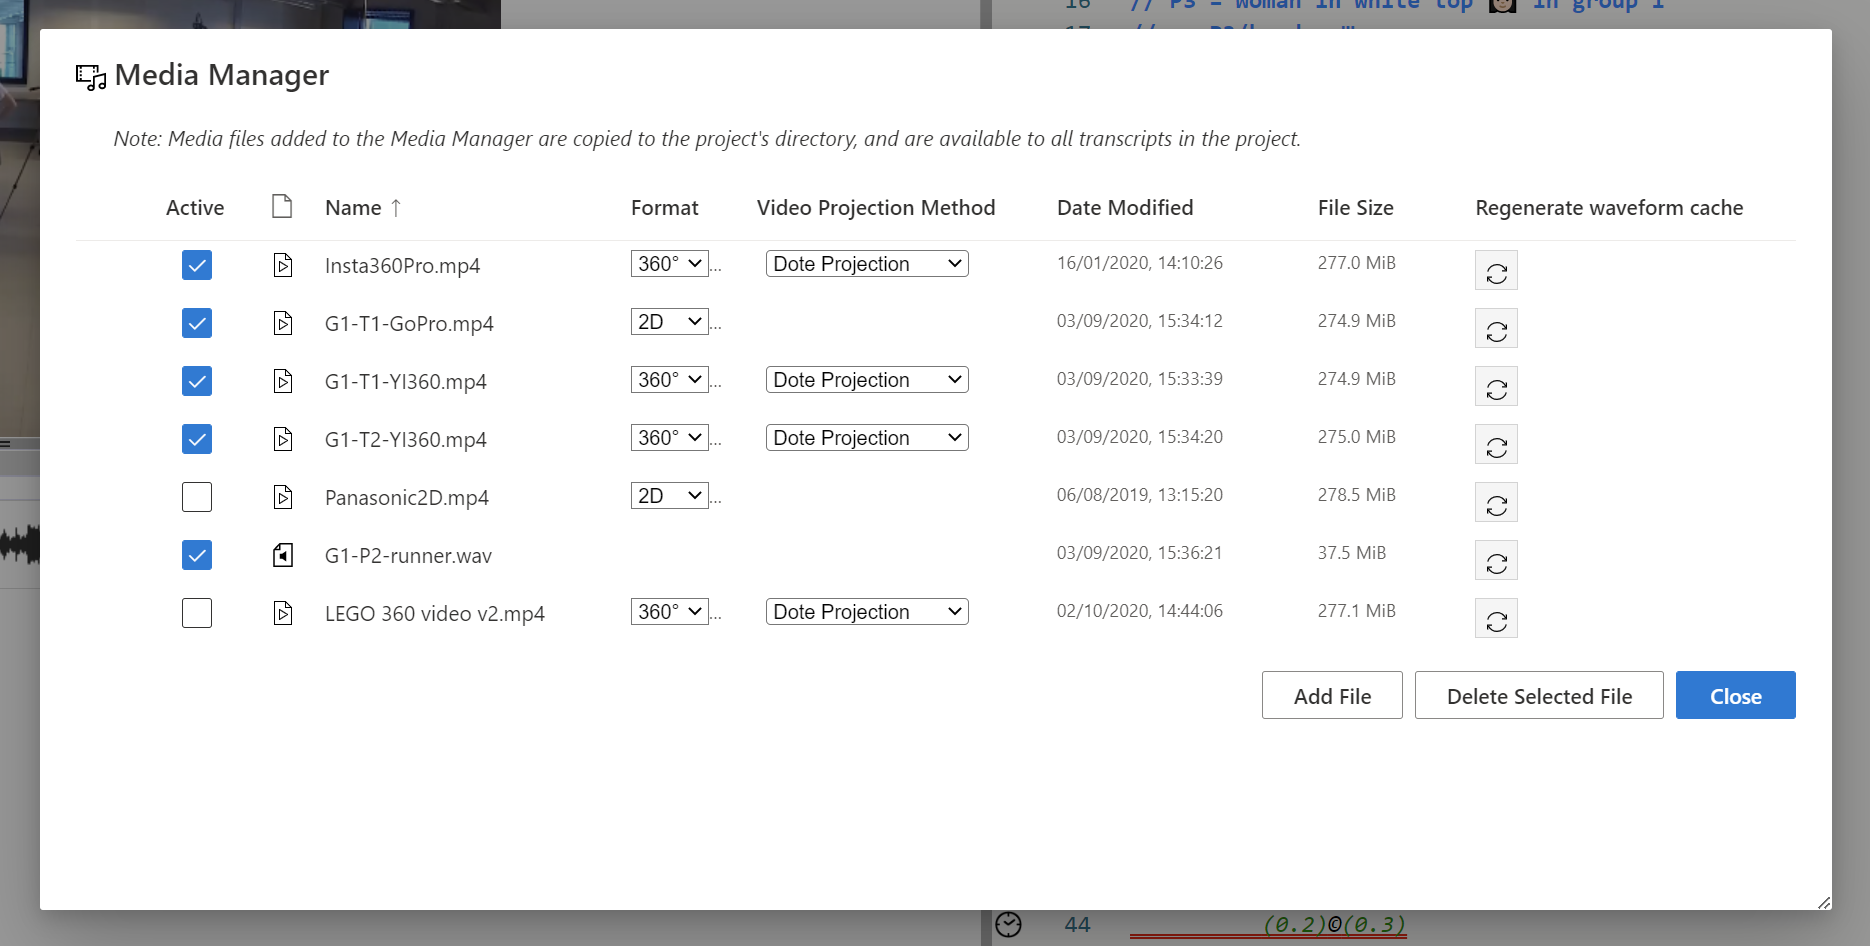
Media Manager
Watch basic and advanced video tutorials on YouTube.
DOTE projects can contain one or more media files associated with that Project.
Media such as audio and video files can be imported directly into a new Project.
The function of the Media Manager is to be able to add, remove and toggle different media sources for your current Project.
Note: it is essential to use synced media files that have the same IN and OUT points, eg. the start and duration of each clip is the same with respect to the event that was recorded. Otherwise, if you have used sync-codes or video-cues, then switching between media sources for the same transcript will simply not work because the timecodes for both will not align correctly across media. Syncing media clips is something to undertake outside DOTE, eg. with video editor software.
Watch video tutorial on YouTube.
How to add a media source to your current Project
- Open
Media Managerby clicking on the button at the top of the DOTE window. - Select
Add Fileto locate a media file and import it into your current Project. More than one media file can be added to a Project.- The file of the added media source will be automatically copied to your Project folder on your computer's file system, unless it is already present.
- The media source will appear in the list.
- In addition, more than one file can be selected at the same time (using the file browser in your OS) to batch import.
- If relevant, select which video format from the pull-down list, eg.
2Dor360. If "360" is present in the filename, then it is assumed that the video is360equirectangular format. - If relevant, select which Video Projection you prefer, ie. how the 360 equirectangular format is rendered in the video panel. This can be changed at any time from the pull-down menu at the top of the video panel. Experiment to see which Projection you prefer; there are subtle differences.
NOTE:
- If necessary, the waveform for a media source can be regenerated by clicking the regenerate button for a specific media source in the list. This is only necessary if the waveform is corrupted or is not displaying correctly or the media file in the Project folder was replaced with a file with the same filename.
Watch video tutorial on YouTube.
NOTES on media file types
- A variety of video formats can be imported:
- The video file works best when it is encoded as
MP4withH.264orH.265compression. - Quicktime (
MOV) format on macOS is not supported. Importing videos in this format may cause DOTE to freeze or crash, so make sure your videos are formatted in a non-QuicktimeMP4format. - 2D and 360-degree monoscopic equirectangular video formats are supported at present (not stereoscopic).
- The video file works best when it is encoded as
- Audio only formats can be imported as well.
In that case, the video panel will be empty.
- Audio formats supported include
WAV,MP3,OGG. - Mono and stereo tracks are supported at present (not ambisonic).
- Audio formats supported include
How to activate a media source(s) in your current Transcript
Media sources that are added to a Project form a common pool available for activation in every Transcript in the current Project. For each Transcript, one or more media can be activated locally in that Transcript. They are selected from the list of media in the pool and activated.
BEFORE:
AFTER:
- Select one or more media sources from the list to be activated or de-activated by clicking the tickbox.
- Click
Close. - The active media will be available in the Video panel of the current Transcript.
The video will be loaded and the waveform will be automatically generated when the media source is selected in the Video panel.
If the waveform does not appear, then the waveform can be regenerated in the
Media Managerfor each media source. If this does not work, see these instructions.
How to rearrange media source items in the list
The list of media added to the Project can be rearranged in two ways.
- Each column can be sorted by clicking on the column header. Clicking on the same column header switches between ascending/descending sort order.
- A media source can be selected. Then click and drag it to a new position vertically in the list and drop.
Note that the Media Manager control panel can be resized by dragging the handle at the bottom right.
How to delete a media source from your current Project
- Select a media source. More than one file can be selected at the same time (using the file browser in your OS) to batch delete.
- Click
Delete Selected File. The media file(s) (and the associated waveforms) will no longer be available in the Project. - Note that the media file(s) will be deleted from the Project folder on your computer's file system. The file(s) will be sent to the Recycle Bin or Trash on your computer. If you empty the Recycle Bin or Trash, then the file(s) will be lost. If you wish to use the file(s) again, then restore and make a copy first in another location.


